When Using Mental-ray, your materials could disappear from your imported assets. Thankfully, just deleting namespaces can fix this issue

This addresses an issue that I started noticing in Maya when using Mental ray . I noticed that when importing geo files with materials assigned to them ( .fbx or . ma) I was loosing access to my shading groups through the attribute editor. which meant I couldn't directly select my material in the Attribute Editor after grabbing my object in the Viewport.
I knew the materials were still assigned. When I rendered the scene , the information was still there. When I went to the hypershade, I was was able to right-click on a material and choose " Select Objects with Material" and the objects with the Material would light up in my view-port. The material was still attached so why could't I edit it in my attribute editor?!
It turns out that there is a very simple solution to this. While I can't give a definitive explanation, I think I have a pretty good theory as to why this happens.
SOLUTION : Remove references/ namespaces from your import.
A. If you haven't imported your assets yet : Turn "Use Name spaces" off in the import buffer before importing your desired object or scene file. This is the quickest way to insure that your materials import in with their shading groups.
 |
| Turn off "use namespaces" in Import Options: File > Import > Option box. This is best if you are not using Maya's UI for your file browser. |
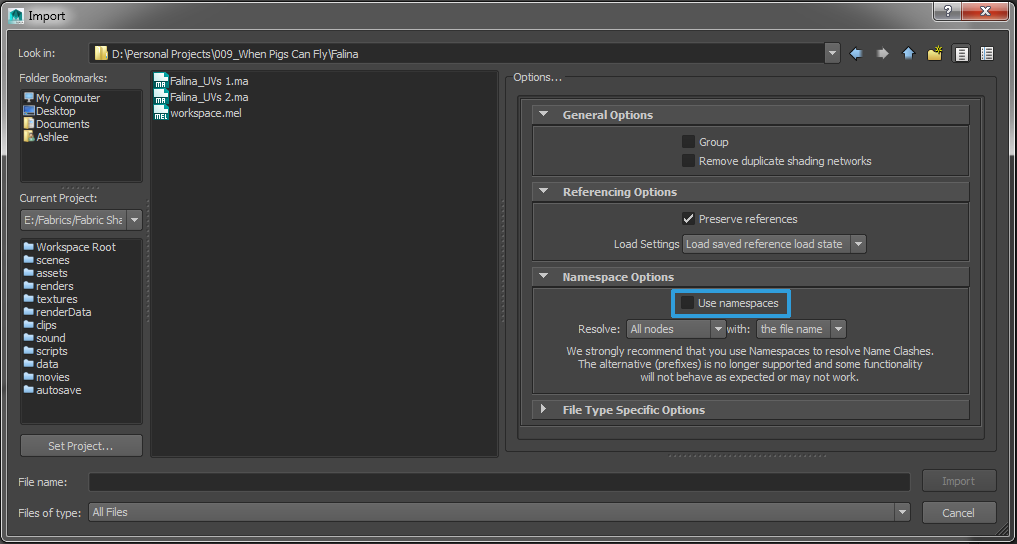 |
| If you are using Maya's UI for File Browsing, you can just turn off namespaces directly from the import window : File > Import |
B. If you have already imported your assets : Strip your name spaces. The easiest way to know if your assets have name spaces is to check the outliner. Objects with name spaces will have a ":" in them. ( file_import : asset_name ). If you see that your imported assets have this syntax, you'll need to do the following to strip name spaces :
1. Windows > General Editors> Name Space Editor : The Name space editor will pop up on your screen. Any imported assets with name spaces will appear in the little list on the left.
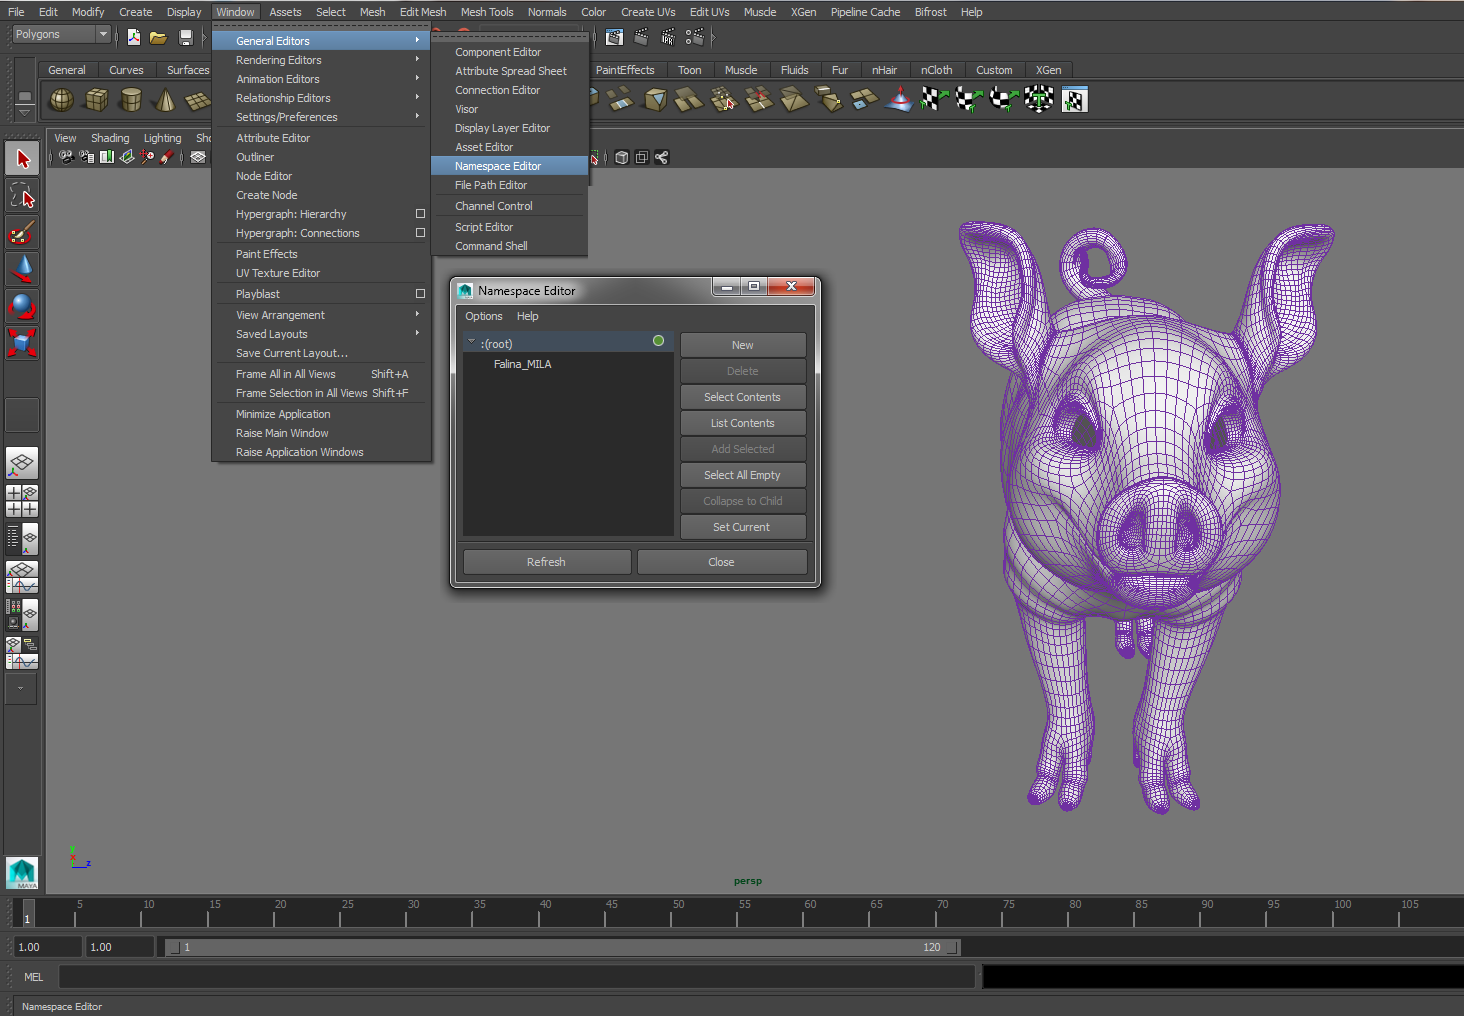 |
| Open the Namespace Editor : Window> General Editors > Namespace Editor |
2. Select each name space and hit Delete.
3. Choose "Merge with Root". This will delete the current namespace of your selection and move all the nodes under the root namespace- basically it puts everything in your current project space.
 |
4. Once all your namespaces are removed, close the namespace editor. Clicking on an object that previously had a namespace, will allow access to your previously hidden Shading Group within the Attribute editor.
C. You have assets in a scene without namespaces and no Shading group in AE : Once or twice I have stumbled on a scene where an object appears not to have a namespace or be a reference but I still can't access the shading group from the Attribute Editor. If this happens, the easiest fix is to :
- Duplicate the problem geometry.
- Assign a new material to the duplicate of the problem geometry
- Delete the old problem geometry.
- Assign the materials that were on the problem geometry to the duplicate geometry.
Explanation : Namespaces Behave like Flexible References.
After doing extensive testing with namespace imports and other renders ( V-ray and Iray), I have come to the conclusion that this is a little limitation in mental ray. It appears that Mental ray thinks that when an object lives under a namespace, it is not treated as a fully unlocked Geo mesh. It instead only has two tabs, much like a reference or a group would; one tab that could refer to position, scale and rotation, and the other tab that pertains to render layer overrides.
If you are just importing parts to a much larger asset, like nuts and bolts to a machine, or rafters to a building, then you probably won't want to have name spaces in your final scene so that material selection and assignment via object selection in view-port is much easier. If you are working in a production like environment, if you want to change an asset in a namespace, it is probably better to update that asset file before importing it in. While Namespaces, in no way, restrict you from creating and finding materials on assets contained within them, as your project grows and more materials get created, you may find it harder to know which material correlates to which object quickly.
Comments
Post a Comment