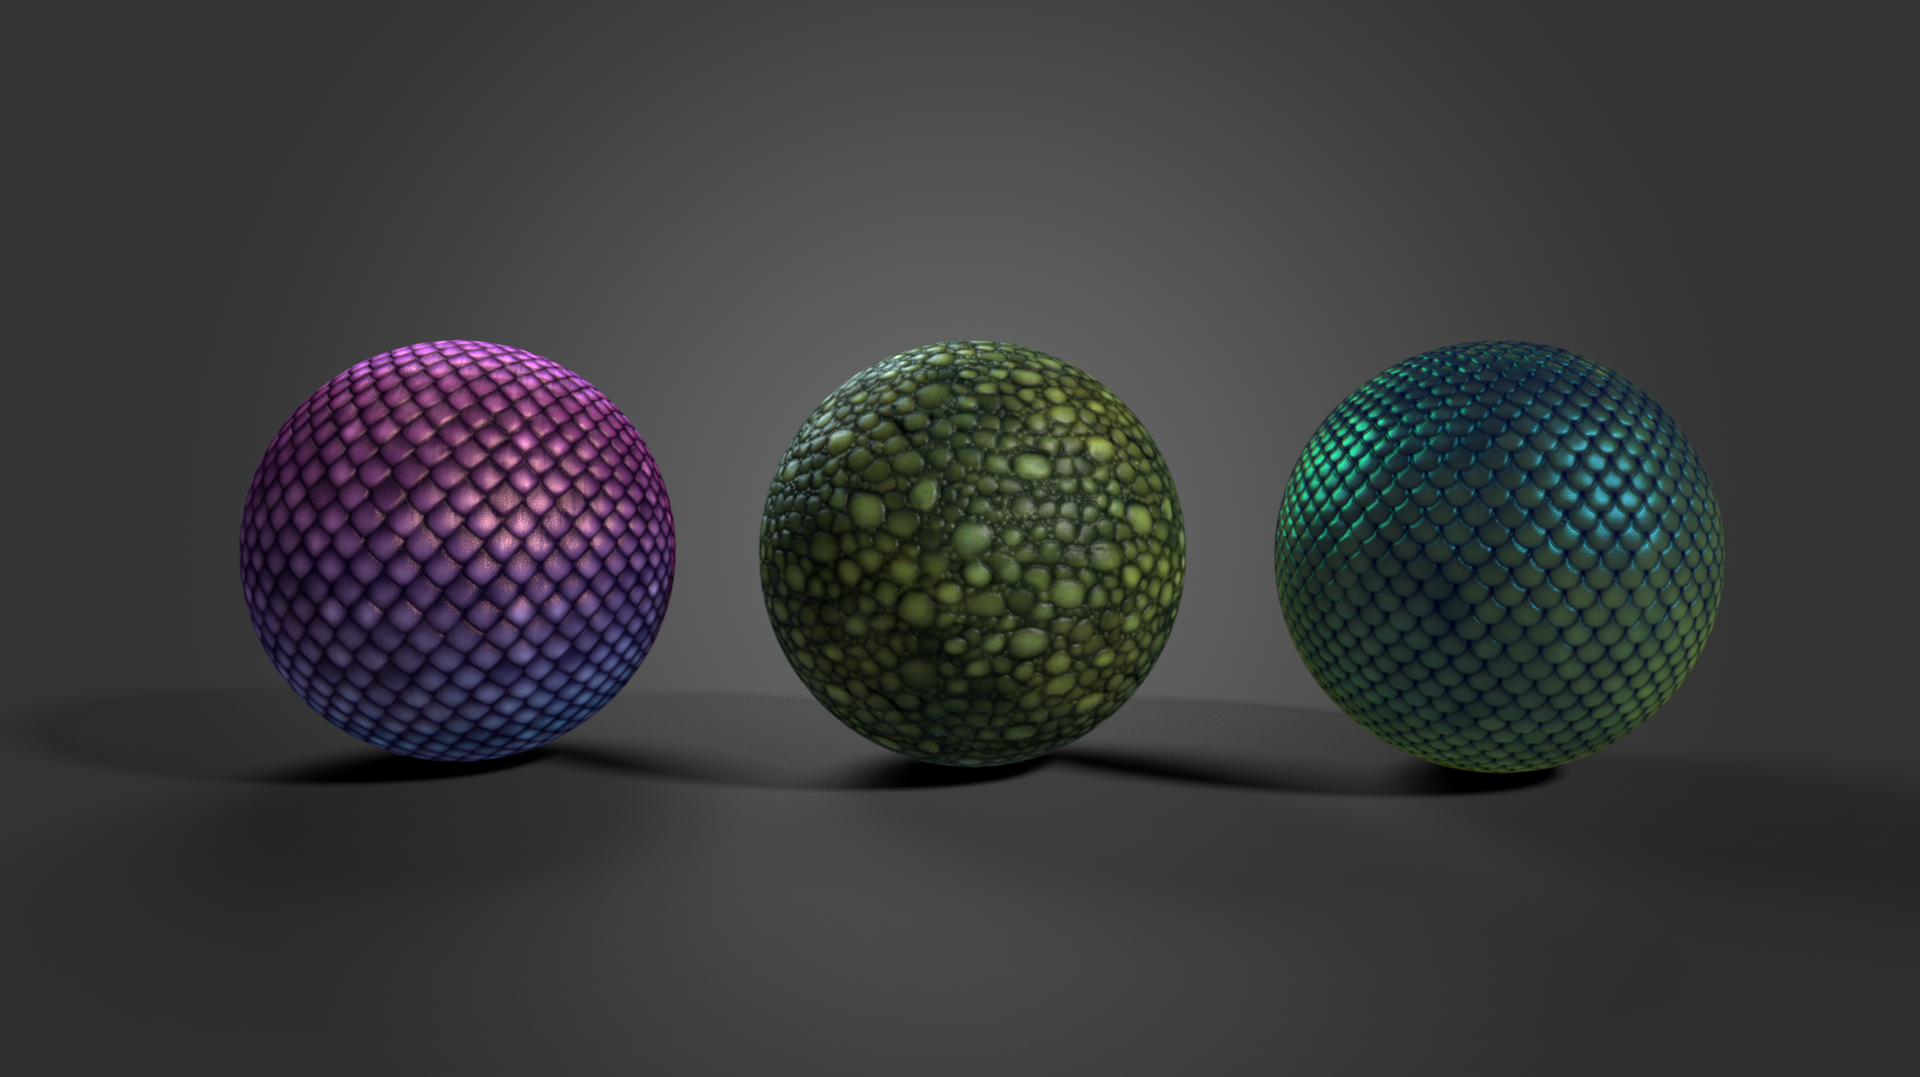
This tutorial goes over how you can connect your new tile-able texture into a vray mtl and play with the settings to create a material that acts like fish scales.
1.) Setting up your Material.
Scales are more complex than we think. They have a level of iridescence , subsurface scattering and micro- specular detail to them that is hard for our eyes to see. These three attributes make all the difference when trying to pull off an interesting and believable scale material. Lets call them cornerstone attributes.
Exploring cornerstone attributes of scales:
This section will go over the definitions of the cornerstone attributes of fish scales. It will brush a little on the biology of fish and how we can use this information when building our material, Feel free to skip this section if biology isn't you thing. :)
Iridescence :
Iridescence basically occurs when the hue shifts with the angle of observation ( point of view) and the angle of illumination ( light angle). For many fish , iridescence occurs as "structural coloration". This basically means that iridescence is not affected by pigment or color. Instead, it is affected by surface variation. In fish, this is due to a layer of "photonic crystals" that break up the surface and reflect incandescent colors of light.
Subsurface Scattering :
Subsurface scattering defines what light does when it enters a slightly translucent object and exits it again. The thicker a translucent object is, the more it absorbs and the less light exits it. In real life, almost everything has a level of translucency that defines subsurface scattering, even fish, reptiles and amphibians!
Micro-Specular detail :
Fish scales have a lot going on that isn't quite visible to the human eye. Most of this is caused by photonic crystals that layer the surface of a scale in unique patterns. "Photonic crystals" help to break up the surface of a material. I like to think of it as "Micro-Spec" or basically, specular detail that is super duper tiny and hardly visible but a key player in developing interesting materials. To be honest, most objects will have a "micro spec pass" but not all objects need it. Scale materials on the other hand, would benefit greatly as the micro spec pass will help to spread out our incandescence.
Vray Material Blue Print:
Our final scale material is going to be a blend of two separate materials. One material will focus on our specular- incandescence attributes and the other will focus on our subsurface scattering. When combined together, they should create an easily controllable scale material where you can adjust the amount of incandescence and subsurface scattering separately.
Material 01: Vray Fast SS2
A Vray fast SS2 material is specifically designed to handle Subsurface scattering. It is physically based and therefore scale dependent. Depending on how big your character ( or material ball) is, you may need to adjust the scale to account for that.
1.) Create a Vray fast SS2 Material in your hyper-shade editor and rename it something like Skin/ scales/ base etc.
2.) Turn off all the attributes in the specular layer. Since We have a second material handling our incandescence and specular highlights, we don't need to calculate them in our Fast SS2 Material. You can select Black ( 0,0,0) for your specular color. This basically means your material has a zero percent chance of catching highlights. While it isn't exactly necessary, you can slide all of your other spec attributes to Zero,
3.) Set your Diffuse amount to 0. Generally speaking, diffuse amount "breaks" your SS2 material. It overrides the affect of subsurface scattering. While this may be useful as a quick fix when you can't seam to get the depth of your scattering just right, it isn't really necessary for this exercise.
4.) Pipe in your diffuse map to your subsurface color node. If you do not have a diffuse texture map, you can create a simple color texture by multiplying your height map ( extracted from z brush) with a color node or - in my case a ramp texture node with waviness and noise variance,
 |
(Create a [Multiply/Divide] Utility. Pipe your ramp node into "input 1" and your alpha/height map into "input 2". Set the operation to "multiply" and pipe the utility into "subsurface color."
|
 |
| Close up of ramp. Adding a little bit of noise variance and combining this with the alpha can make an interesting diffuse. |
*** This is all you need to do for your SS2 material. If you want more translucency, feel free to play with the scale attribute. I have left mine at the default of 1.
Material 02: Vray MTL
The Vray material is going to handle the specular highlights and the incandescence of our fish scales,
1.) Create a Vray MTL and rename it to incandescence or Specular.
2.) Set your Diffuse Color to Black. Since we will be adding our "incandescence" material to our Skin material, we want to make sure that the parts we don't want to see (the color) are black.
3.) Plug in your bump map. The bump map is simply the height sculpt we extracted from z brush in Part II of this tutorial.
4.) Create your Specular pattern. For this project, I tried to create an interesting specular pass by combining two black and white masks together, The first black and white mask is the height map that we created in part 2 of this tutorial.This mask will help us define the overall shape of the scales by assisting the bump in defining edges around the scales. The second black and white mask is a granular pattern that I have tiled approximately 10 times to create a seemingly detailed microspecular pass. This was may way of "faking" photonic crystals which help to give fish scales their interesting incandescence. To add these two maps together we, we are going to use the Multiply /Divide Utility set to multiply.
 |
Create a [Multiply/Divide] Utility. Pipe your microspec "input 1" and your alpha/height map into "input 2". Set the operation to "multiply". |
5.) Make it incandescent! Before we plug our specular pattern into the reflection node of the Vray material, we are going to add a bit of incandescence. Basically, what we want to do, is make it so that the areas of the object facing away from the camera have a nice colorful light fall off to the center. We can achieve this by creating a sampler info utility. Basically, a Sampler info utility samples a particular attribute that the user defines. In this case, we want the sampler info node to detect "facing ratio". All this means is that the node will apply a particular map or affect to your material based off of what is facing the camera and what isn't.
Implementing Facing Ratio:
Create a "Sampler Info" Utility and a "Ramp [2D Texture]" Node.
Middle-Mouse + Drag the "Sampler Info" utility over the "Ramp [2D Texture]" . In the drop-down, Select UV Coords.
In the connection editor, select "Facing Ratio" from the left and Select both the "U Coord" + "V Coord" on the right.
 |
Create a Facing Ratio Utility.Middle Mouse + Drag it over your ramp texture. In the connection editor, select facing ratio as your output and uvCoord as your inputs. |
Now, facing ratio will drive your ramp, provided that the ramp is either in U coord or V coord. The white of the ramp will affect the edges and the black of the ramp will affect the center falloff of your object. Because this material is incandescent, choose, colors to drive your ramp.
For this material I chose a ramp made of a light blue and a light yellow.
Technically, you can plug this ramp directly into the specular field of your vmaterial, but for this material, we want to make sure our photonic crystals are there, So we are going to combine our new facing ratio ramp with the specular pattern we created in step 4.
To do this, we are going to create another multiply divide utility. We want to plug the Multiply/Divide Utility of the Specular maps into input 1 and the color output of the ramp texture into "input2". Set the Multiply / Divide Utility to "Multiply".
Finally, drag your new Multiply/Divide Utility output into the "Reflection" of your Vmaterial.
Combine Your Materials:
Combining our materials will give us the soft organic feeling of scin but the hard, interesting reflective falloff on incandescence that we often see in scales.
1.) Create a Vray Blend Material [VrayBlendMtl] .
1.) Create a Vray Blend Material [VrayBlendMtl] .
2.) Combine your Fast SS2 material with your Vray MTL. Plug the Fast SS2 in as the Base. Your Vray Material ( driving the Specular attributes) should be Your Coat Material 0.
3.) Turn on Additive Mode. Additive mode will make it so that when the materials blend together, only the lighter colors will blend on top. Additive mode is a lot like turning the blend mode of a later to "Lighten" or Screen in Photoshop. By doing this, we are using the color of the Skin material but the unique incandescence that we built in our Vmaterial.
3.) Turn on Additive Mode. Additive mode will make it so that when the materials blend together, only the lighter colors will blend on top. Additive mode is a lot like turning the blend mode of a later to "Lighten" or Screen in Photoshop. By doing this, we are using the color of the Skin material but the unique incandescence that we built in our Vmaterial.
Final Network and Result:
In the end you will have created a fairly complex and fully controllable network that can work for almost any scale type, Below, you can see what the final network looks like, I used the same technique to build three very different scale looks.
 |
Final Shading Network for Fish Scales |
Using this technique, you can create a lot of different looks. Click on the image below to see breakdowns of the scales I created using this technique.
 View Scales Breakdown
 View Scales Breakdown


Comments
Post a Comment