
WIP: Elegant Seahorse Part II

I learned that fins are a lot of work. Sculpting scales, no problem. Making fins? ehhhhh. 
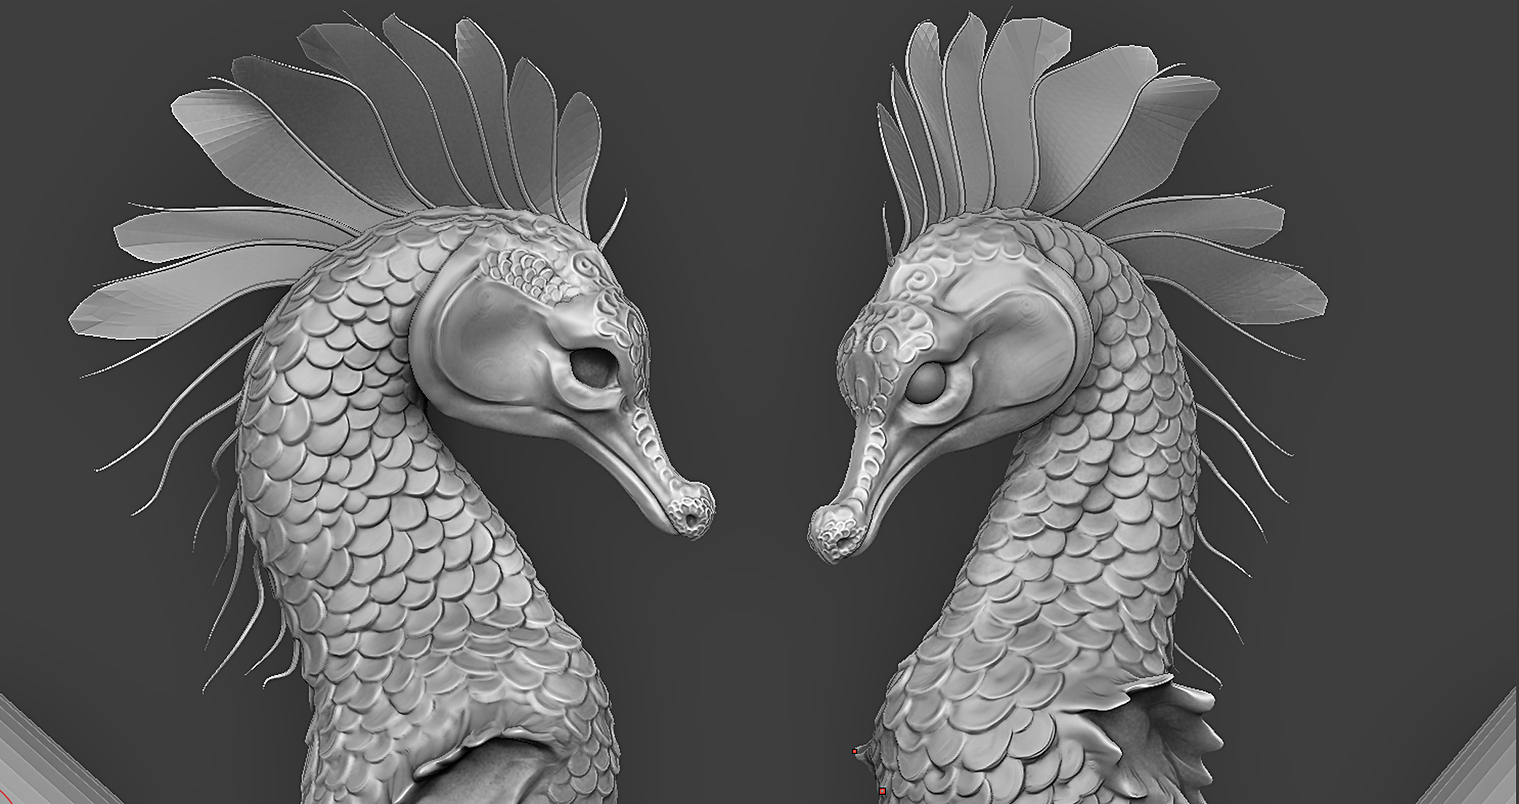
In this update, I changed the face a bit and continued blocking out the scales on the body .
I decided that I really didn't like the fins on the seahorse from week one , so I decided that I wanted to begin to play around with shapes and ideas that I'd be happier with. Since this guys isn't really grounded in reality, I took a lot of liberties with how big the fins were and how they were shaped. In the end, I decided to go with a spiny dorsal look , like a bass but much longer in comparison to the body like a lion fish. I played around with shape and flow as well, drawing influence from beta fish. I think this gave me some really nice, elongated and smooth shapes to play with.

Working on Fins

To create the fins, I exported my seahorse into Maya and decided to get an overall feel for flow and shape with the dorsal fins.
To do this, I used the Curve tool to give me a nice flow and action line.
First, I used curves to give me an idea of the size and overall shape of the fine masses. I planned on making each spine of the dorsal fin separate, similar to a lion fish. 

When I was happy with the overall shapes, I lofted the curve to create a large dorsal fin shape. Using the new surface of the loft, I generated multiple "spine curves" . When I was happy with their flow, I placed and extruded cylinders along them, making sure to taper the fall-off so that the spices come to a fine point.
I lofted the general shapes of the dorsal fins to get an idea of the flow and to generate spine curve shapes. Once I did this, I extruded cylinders along the spine curves with a bit of a taper. 

Finally, I wanted to generate individual, slightly attached fins between each spine. To do this, I extracted a curve from the inner and outer edges of each spine cylinder and then lofted them together with an additional curve between them, to drive the roundness of the fin tip.
After getting the spline built, I extracted the curves from the inner and outer edges of each spine. I created a rounded connecting loop between each neighbor spine and then lofted the curves. The curves created results similar to those in the image. WHen I was happy with the shapes, I converted the curves to polygons. 

When I was happy with the curves, I converted them to polygons and tested an import into Zbrush.
Making the fins is time consuming but I am happy with the general layout and quality of them. I will continue building them out along the back of the seahorse and on the sides. Once I finish the general fin shapes, I will add detail to them and smooth them out in Z- Brush. In the meantime, I will get plenty of practice with nurbs modeling and poly conversions!

<< WIP : Elegant Seahorse Part I || WIP : Elegant Seahorse III >>

Comments

Popular posts from this blog

Exploring Scales With Substance Designer

Preface Some of my first blog posts focused around how to create a "scale " material from texture to render in Maya with V-ray. The Series " Making A Seamless Scale Material " took a more "traditional" approach to creating a tile-able scale pattern. I think this method still has its strengths as it also covers valuable tips and tricks that can be used in Illustrator and Zbrush, but I wanted to share another method for creating scales by using a program dedicated to creating scale-able, flexible, and tillable procedural textures in a node based- lossless editing environment. I have been using Substance Designer almost exclusively for texture generation for the last year now and the amount of flexibility and possibilities that can be created are virtually endless. In truth, Substance Designer is no walk in the park for traditional texture artists. Its node based editing system and use of procedurals require you to think in a different way- but in the

Making a Seamless Scale Material Part I

Today, I wanted to share my process for creating a seamless, scale-able material that can either be projected onto Zbrush models or applied as materials to UV'd models inside of programs like Maya and 3Ds Max. I used this when creating my unique stylized scale surfaces. You can find breakdowns for them here : Stylized Scale Materials This is a tutorial that will be split into four parts. Below is an outline on what we will cover.  This post will be addressing part 1.            Part 1:  Approaching Scales and Creating a Pattern.           Part 2:  Refining your pattern in Zbrush.           Part 3: Creating a compelling and believable scale Material inside of Maya I will be using the following programs to create my Scale material : Adobe Photoshop (optional) , Adobe Illustrator (optional), Zbrush , Vray and Maya.  Part 1: Approaching and Creating A Pattern    Creating a seamless texture can be done in many ways. This tutorial goes over just one way to cr

Creating Spiny Fins With Curves and Surfaces ( Maya)

This "little" tutorial will go through the process of creating fins and fin shapes using curves and surfaces in Maya. I found this method to be the most "accurate"while building out the spiny shapes of fins in my current project, and thought I'd share my process. The tutorial below is broken down into three parts and will cover the basics of working with Curves in Maya. A. Building the Main Shape B. Creating the Spines C. Lofting Fin Shapes I will be diving into detail about certain tools in Maya. In this tutorial, I will go over using Live surfaces, converting edges to curves, lofting surfaces, converting nurbs to polygons, extrusions and moving constraints like snap to curve and snap to vertex. A. Building The Main Shape. Create a base curve . The base curve should match the center line of your mesh. This will define where the fin shape will start. If you have a mesh that is already topologized with a clean center line, extracting a curve f